Friday, August 14, 2015

Interlude - Meet the Cresties

I realized that I've been so focused on chronicling the build itself, I never introduced you guys to my geckos.  So, here's a small little introduction for each of soon-to-be inhabitants of my vivarium.

Pyjak


This little guy was my first gecko, purchased back in Sept 2014.  He's about 15 months old now.  Pyjak's a little bit of a runt, but he's got an awesome personality - he's super chill about being handled and will jump right into our hands when he gets excited to see us.  He's tailless, due to some escape artist foolery he pulled during a tank clean one time, but he gets along just fine now that he's used to being a little bit shorter than before.  Not quite sure of the morph - our best guess is flame chevron.  His hobbies include eating insects and getting freaky with our female, Penny.

Penny


And this here's my big little girl Penny.  We've had her since May of this year, she was 18 months when we brought her home.  She's a bit shyer than Pyjak - it took her a couple months to warm up to us and start being comfortable out of the tank.  Penny is our little athlete!  She takes home the gold in the long jump, sprints, hurdles, and even the coveted 'sit still while breathing really really hard' event.  Her other hobbies include chowing down on fruit and rebuffing Pyjak's romantic advances.  As near as we can tell, she's a buckskin morph.

Thursday, August 13, 2015

Day 11

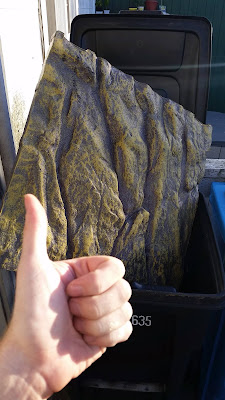
I got my foam!  Let's finish this bad boy!


While I was patiently waiting for Amazon to deliver my package, I went ahead and started planning out where I wanted my other two pieces of background decoration to be.  I then siliconed the cork piece to the background, just like I did with the main centerpiece.  The hunk of bark I actually want to lay on the wet foam, since it's already pretty flat, so I'll just line it up on the glass for now.


 Lookin' good.

Anyways, back to foaming.  Fortunately wet Great Stuff sticks well to dried Great Stuff, so there's no need to do anything other than spray on like last time.

After about 15 minutes or so, I'm done!

Yay!

You'll notice I left about 4 inches of space between the bottom and the foam - that'll be where the substrate/drainage layers go up to, so there's no need to foam down that far.  Now we just gotta let this bad boy dry.  Shouldn't take longer than a day.  Next step - trimming it down.  I'll update once I'm ready to do some cuttin'.


Wednesday, August 5, 2015

Day 4

After letting the silicone dry for a few days I found some time to attempt the next step - adding the centerpiece and foaming in the background.  I first need to position my large piece of wood that will serve as the main component of my background and silicone it into place.

Looks good.

The piece fits perfectly - I'm liking the look of it already.  After waiting a half-hour for the silicone to set a bit, I'm ready to start foaming.  I'll be using Great Stuff Pond & Stone Insulating Foam for this part.  It's important to find foam without unsafe additives, and since this stuff is safe for fish, it's safe for geckos.

It's also messy.

And it's here that I make my first rookie mistake.  Vastly underestimating how much foam it would take to fill in the background, I only purchased one can.  You can see the progress I made off of just that one.

Not very much at all.

Welp, I guess I knew there would be setbacks.  I've gone ahead and ordered two more cans of Great Stuff on Amazon, and since I'm cheap, I'm using standard shipping.  So... guess the project is on hiatus until I get more foam.  There are some things that still need to be finalized (substrate, drainage layer, plants), so I'll work on getting all that situated in the mean time.  I'll update next week once the foam arrives and I have a chance to continue.

Monday, August 3, 2015

Day 1


Yesterday I finally purchased the ideal terrarium for my build (Exo-Terra Medium Tall, 24" x 18" x 24") as well as some fixings for the background, and I'm ready to start.  I'll be making a custom background with live plants for the terrarium, so the first step is throwing away the junk foam background. 

Boom.

Now I'll need to lay the groundwork for the background.  Before anything else can happen the background needs to be set and cured, so it's important to start on that early.  I'll first be putting a small layer of silicone on the back, which will allow the Great Stuff I'll be applying later to stick better.  


I'm using Aqueon Silicone Clear for this job.  This step isn't 100% necessary, but I felt it was important to guarantee a good sticking background.  I use a putty knife to spread out the excess and give it a nice even covering.
The whole process took about 10 minutes; the clear silicone means mistakes are much less noticeable and aesthetics are not important here.

All done!

Now, we let it sit for a day or two to cure properly.  Next step is the fun part - foaming the background.


Introduction

Hi, I'm Sean.  I've had two crested geckos for about 10-11 months now, and I've decided to try to build them a proper vivarium, both as a more enjoyable habitat for them to live in and as a personal project for myself.  I'll be chronicling the steps as I take them to document the whole process from start to finish.  While this isn't exactly meant to be a tutorial, feel free to use it as a reference if you want.  This is my first viv build and I'm keeping it pretty simple, so there probably won't be anything revolutionary here, but hopefully someone will get some use out of watching the process unfold.